
Our WooCommerce BigQuery connector allows you to fetch all the standard order, product, and customer data. But every WooCommerce store is unique — you might also store valuable information in meta fields. To make sure you can bring those insights into BigQuery, we’ve built support for custom fields.
This guide will walk you through how to add custom fields in your connector setup and verify that they’ve been successfully imported into BigQuery.
Why Add Custom Fields?
Many WooCommerce setups use meta fields to store extra information, such as:
Marketing attribution (e.g., UTM parameters)
Product details (e.g., product type or material)
Order notes or tags specific to your workflow
By adding these custom fields to your BigQuery connector, you ensure all your reporting, dashboards, and analysis include the data that’s most relevant to your business.
Step 1: Enable Custom Fields in the Connector
In your WooCommerce BigQuery connector setup, tick the checkbox “Add custom fields.”
A new row will appear where you’ll enter details for your custom field.
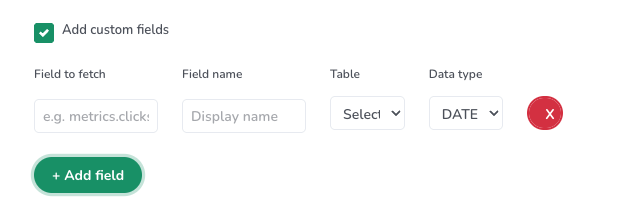
Step 2: Fill in the Custom Field Details
Each custom field row has three inputs:
Field to fetch
This is where you specify the exact meta field path from WooCommerce.
The syntax depends on where the meta field lives (order, product, or line item).
Field name
Choose a descriptive name for the field in BigQuery (e.g.,
utm_sourceorproduct_type).
Data type
Select whether your field is a METRIC, DIMENSION, or DATE.
Most meta fields will be DIMENSION.
Step 3: Use the Correct Syntax for “Field to Fetch”
The most important step is entering the right value for Field to fetch. Here’s how:
Order-Level Meta Fields
For order-level meta fields, use:
meta.order.{your_meta_field}
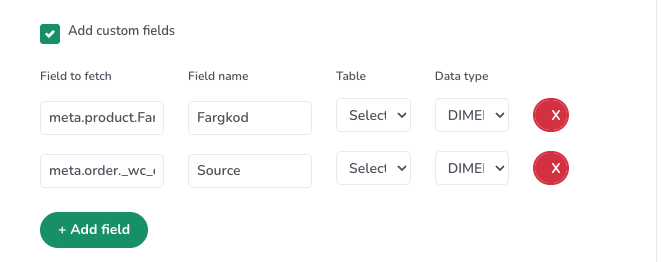
Product- or Line Item-Level Meta Fields
For product or line item meta fields, use:
meta.product.{your_meta_field}
Example:
If you want to pull the product type stored as a meta field, enter:
meta.product.product_type
🔍 Note: The connector will check both the product table and the order line items table for your field. If it exists in either, it will populate in BigQuery.
Step 4: Verify Your Custom Field in BigQuery
Once you’ve saved your connector setup and data has synced:
Open your BigQuery project.
Preview the relevant WooCommerce table (e.g., orders, products, or order line items).
Look for your custom field (using the field name you set in Step 2).
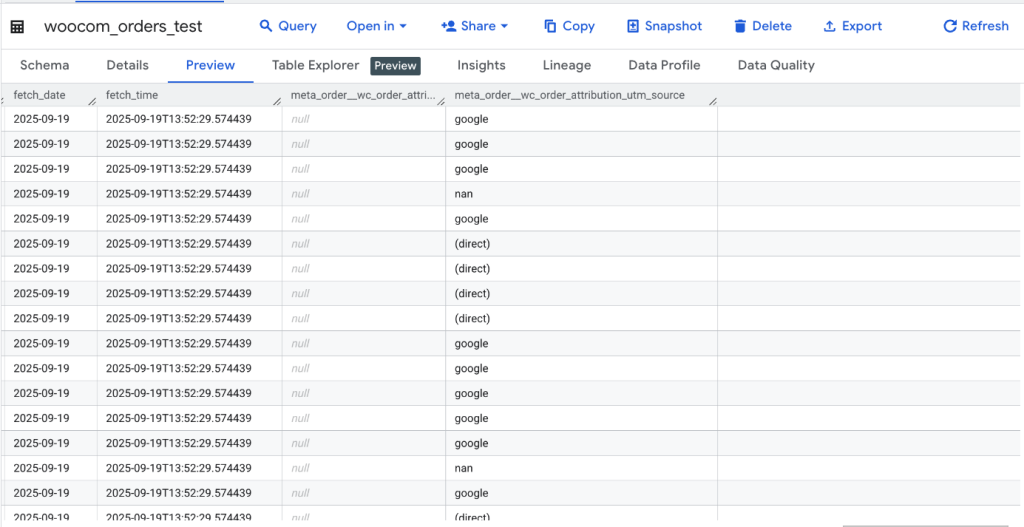
If the field appears with data → ✅ Success!
If the field is missing or empty → ❌ The syntax in “Field to fetch” may not match your WooCommerce meta field. Double-check the spelling and location of the meta field in your WooCommerce API.
Troubleshooting
Field is empty in BigQuery → Confirm the correct syntax and ensure the field actually exists in WooCommerce.
Not sure which object the meta field belongs to? → Test both
meta.order.{field}andmeta.product.{field}.Still stuck? → You can contact us here for help.
Best Practices for Adding Custom Fields
Use clear, short names for your custom fields in BigQuery.
Always check your WooCommerce API documentation or test responses to confirm the correct meta field keys.
Start with one or two fields to validate your setup before adding many.
Conclusion
By adding custom fields, you extend your WooCommerce → BigQuery data pipeline beyond standard data, ensuring your reporting covers the unique metrics and attributes that matter most to your business.
Give it a try today — and if you need extra help, our team is here to support you.